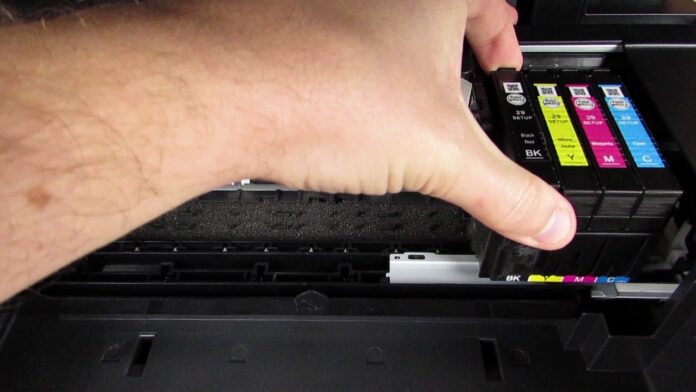
If you are a routine printer user, you know the pain behind changing the ink cartridge. If you are not sure whether it is necessary to replace the ink, you may procrastinate. Mostly, this is because reading instructions from the instruction book sounds hard. So, to save you from the lengthy instruction manual, we have brought a simple guide on changing Epson ink cartridges.
Epson is one of the best printer companies in the market. There are some slight differences between printers when it comes to ink change procedures, but the process is the same for most printers. So, let’s dive straight into the cartridge replacement process.
How To Check The Ink Levels?
Before starting the cartridge replacement, you must check the ink levels. Although printers give a low ink warning, it is always good to check the ink levels manually too. So, let’s first see how to check the ink levels.
Step 1: Home
The first step is to click the home button to access the setup.
Step 2: Setup
After clicking the home button, you will see the setup option. Hit the OK button to proceed to ink levels.
Step 3: Ink Levels
Once you have clicked the OK button on the setup, you will see an option for ink levels. Select this option and the ink levels will appear on the screen. This will help you gauge which cartridge should be replaced or refilled.
The Easiest 5-Step Guide To Replacing Epson Ink Cartridges
Replacing ink cartridges is not a difficult task. However, we have further summarized it for you. Hence, follow the steps below and replace your ink cartridges swiftly.
Step 1: Removal
Before going for the replacement, you will have to remove the previous ink cartridge by opening the printhead. However, make sure that you have the replacement cartridge ready before you remove the previous one. This is because if you expose the printhead to air for a long time, there is a chance that the printheads will get clogged and this can even lead to a need for replacement.
Pro tip: It is good to clean the printhead with a lint-free cloth before replacing the cartridges.
Step 2: Expose The Ink Cartridges
After checking the printhead, it is now time to check which cartridge needs replacement. For this, you have to turn on the printer. Once you do so, the printer will show the empty cartridges. All you need to do is proceed with the instructions given on the printer screen.
If you want to replace a cartridge that is not yet empty, then you need to follow the following steps.
- Go to the home button and select the setup option.
- Go to the maintenance option and press OKAY. This will take you to the ink cartridge replacement option.
- After selecting the ink cartridge replacement option, you can lift the scanner head to get access to the ink cartridges.
- Make sure that you do not touch the printhead or the white cable present inside the printer. Leaving fingerprints on the printhead will deliver an error message on loading the cartridges.
Step 3: Manually Remove The Cartridges
To eject the cartridges from their slots, you just need to apply a little push at the back. This will easily slide out the cartridge. However, make sure that the push is not sudden or else there is a chance that your clothes, hands, or the floor will get stained due to ink droplets. Therefore, apply smooth force and slowly but steadily remove the cartridges.
Step 4: Prep The New Cartridge
The new cartridge will be sealed in a plastic wrap and clipped at the bottom or top. Before using it, you must shake it 4 to 5 times, this will make the ink homogenous and remove any clogs. After that, remove the plastic packaging and the yellow tape to expose the vent hole. Make sure that the cartridge does not leak.
Step 5: Insert The New Cartridge
Now simply put the new cartridges in the old cartridge spot. You might need to press a bit. Once you hear a click sound, it means that the cartridge is installed. Make sure that you insert the cartridges in their respective slots. This is essential for the perfect working of the printer.
After inserting, you can close the printer’s cover and click the “check” option on the screen. Once done, your printer will start the ink priming and preparation process. This can take a few minutes. When done, the printer will show a message that it is ready to print.
Final Verdict
Replacing the ink cartridges can be pretty handy if you prep the new cartridges before removing the old ones. Moreover, it is good to concoct a cartridge recycling method before removing them. It is also advisable to keep the cartridges out of reach of children. Another expert recommendation is that you should remove the seal from the new cartridge over a bin or sink. This way if any ink spills, your floor won’t get tinted.


