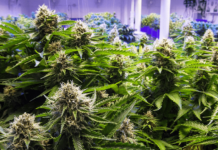
Grow tents kits are ideal for all gardening enthusiasts, whether they’re growing leafy greens, herbs, nightshades, flowers, or any other type of plant. For your indoor or hydroponic garden, here are seven reasons to use a grow tent.
To begin, take the first step.
Step 1: Set up the Tent
Begin by assembling the frame according to the provided instructions and then transporting it to its final location. If your grow tent will be in a carpeted area, make sure the floor is covered with mats or plastic. After that, add the cloth cover and double-check that all seams and zippers are in good working order.
Step 2: Install the Grow Lights
Attach your lights to the tent frame’s crossbars. The majority of lights will come with mounting hardware to aid in this process. Just make sure the lights are held at the proper heights. Check the manufacturer’s instructions if you’re unsure.
Step 3: Install Ventilation
In most cases, the fan and carbon filter should be hung inside the tent. It’s best to get closer to the top of the frame because it removes the hotter air that rises while also maximising odour absorption. Hang the exhaust fan with the intake facing the carbon filter and the exhaust facing the ventilation opening.
Step 4: Install Monitoring Devices
You’ll need to keep an eye on the humidity and temperature inside your grow tent if you want to maximise your gardening success. Monitors should be installed at the same height as your plants. It’s possible that mounting the equipment too low or too high will result in inaccurate readings.
Step 5: Set up timers.
One of the best features of a grow tent is the ability to automate processes. For example, you can programme your timers to turn on and off your grow lights when they’re supposed to.
Step 6: Put it to the Test
Turn everything on and see how it works once it’s all set up. This allows you to pinpoint any problems and fix them before bringing your plants inside.
Step 7: Take the necessary safety precautions
It’s critical to double-check all electrical connections before you start growing. Make sure there aren’t any cords on the floor that could get wet and cause a hazard.
Step 8: Place Your Plants
It’s time to put your plants inside the grow tent now that everything has been set up and tested! Temperature, humidity, CO2 levels, and other environmental factors will be affected by your plants, so make sure to adjust your settings as needed over time.
Checklist for Growing Tents
You’ll need to gather your supplies before you begin growing. First and foremost, you must select the appropriate grow tent for your needs. What size, for example, do you require? What kind of frame or tent should you use for the plants you want to grow? You’ll also need to figure out what other materials you’ll need for your project. We’ll go over the most common supplies you’ll need to make your indoor garden a success in this article.
You’ll need to buy the following items in addition to the grow tent:
• Planting mediums
• A source of light
• Monitors or metres
• Seedlings or seeds
• Fertilizer or liquid nutrients
The materials you’ll need will vary depending on the type of garden you’re creating. We offer a wide range of soil, grow media, hydroponic nutrients, and other products. Whatever your requirements, we’re confident that you’ll find what you’re looking for in our online store.


