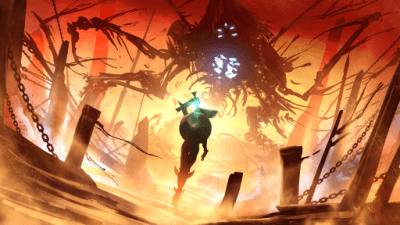
OSRS Tombs of Amascut Wardens Final Boss Guide
Here’s everything you should know before entering the final boss in Tombs of Amascut and the best-known strategies so far.
Tombs of Amascut is the 3rd raid in Old School RuneScape. You can do it solo, or with friends, in teams as big as eight players. The raid represents a challenge for your combat skills, but you’ll also need to solve puzzles to advance and, if in a group, communicate well with your team members. For each successful run, you’ll receive rewards that you can or cannot turn into OSRS GP. Some of the rewards are untradeable, but they are fantastic quality of life upgrades, so they’re valuable even if you cannot turn them into OSRS gold.
You can tackle the four previous bosses in any order you want and even adapt your strategy to defeat them based on personal preference and other considerations such as consumables and raid-specific consumables that you will receive in between bosses. Once you solve their specific puzzles and defeat the four bosses: Kephri, Akkha, Ba-Ba, and Zebak, you will be able to access the final boss room, called the Wardens, where you’ll have to defeat two bosses: Tumeken’s Warden and Elidinis’ Warden.
The Overview of the Fight
The fight has three phases, but before you can begin, all party members need to speak to Osmumten as part of the mini-quest Into the Tombs. You must use all three combat styles and protection prayers throughout the fight. When the battle begins, the center obelisk will start sending energy spheres toward the two wardens. The wardens are statues or automatons who have cores inside. You will need to body block some of the energy balls, so they don’t get charged up simultaneously, but doing so will damage you over time.
Remember that throughout this final boss, you will be attacked by the wardens themselves, by some of the spirits of the bosses you previously killed, and by the room itself. Therefore, you must keep many mechanics in mind, including that sometimes your prayers can get disabled, and you should turn them back on.
Phase 1
Stay on either the west or the east side to block some of the orbs. This will prevent the warden’s charged attacks from hitting simultaneously and making it easier to dodge. Every time an energy ball hits you, you will take damage, so you should consume something that heals you over time.
Remember that the warden that gets the full energy will be the one you’ll face in Phase 2 and the one that you body block is the one you’ll face in Phase 3. During Phase 1, the wardens will strike with two types of attacks from the moment they get fully charged till you manage to bring the obelisk’s HP to zero.
The first attack type is the charged shot one. Large or small energy balls will target you. Group up with your team to dissipate the damage for the big ones. For the small ones, run away from your team to prevent all of you from taking damage. The other attack type is disco party. The wardens will spawn small floating pyramids that will damage you if you stand next to them. You should stand on one of the sides of the room and step out of their range. This can work well, especially if you’re using range to damage the central obelisk. If you’re using melee, you will have to dodge. However, using range with the long-range option on the weapon is currently the best strategy to avoid damage.
Phase 2
This phase is pretty simple, especially if you know your way around prayer and gear switches. Attack the warden until it drops its core out. Depending on which warden you are fighting, you can use magic or range against the warden in this phase. Tumeken will pray protect from magic and melee, and Elidinis will pray against melee and ranged. Once the core drops out, use magic or melee on it. The warden will attack you using all three attack styles, so praying is crucial for an easy fight. The warden’s magic attack looks like a red skull, and the ranged one like a white skull for ranged. They will only attack melee if you’re close to them, so you can avoid this by kiting them.
When the second phase starts, you must avoid standing near the central tiles or the margins on the west, east, north, and south sides to prevent getting hit by the windmill and converging beam attacks. Besides alternating their basic attack styles, the wardens will also hit you using two kinds of special attacks during the second phase. The first one is the imprisonment attack. It looks like a dark projectile; you can dodge it by moving away from your position. If you fail to dodge, you will be rooted.
The other special attack is a divine projectile. It can be shaped as a scimitar, arrow, or spell, and it will disable your prayer; you need to re-enable them correctly. For example, if it’s shaped like a scimitar, enable protect from melee.
During Phase 2, you will also need to dodge the attacks from the obelisk. You can either stay on the opposite side to avoid the converging beams or, with great timing, move through them diagonally. For the windmill beam and lightning skulls, simply move away from them.
Phase 3
This is the most challenging phase and the actual last boss fight. If you hate swapping protection prayers, you might feel like this is a breath of fresh air for you until the boss reaches 60 percent HP.
The enhanced warden will not attack and does not use any protection prayers either. You might find it helpful to range the boss and stand on the opposite end of it. Mark the center tile on the edge, leave one unmarked, then mark one to the left and one to the right.
This is because the boss slams the ground right, left, and in both directions. You will have to move on one of the marked tiles to avoid damage. As the fight progresses, the warden will stop slamming the ground every time you manage to bring its HP bar down by 20 percent.
The warden will be protected against all attack types and spawn skulls on the ground that you need to kill to resume damaging the boss. At 60 percent, Akkha’s spirit will aid the warden in the fight, and at 40 percent, Kephri will appear when fighting Tumeken. When fighting Elidinis in the third phase, Zebak and Ba-Ba will join the fight.
Akkha will attack with range and magic, so you must start using protection prayers again. Kephri will attack with her fireball, while Ba-ba will drop an easily dodgeable boulder. And Zebak will use magic and ranged attacks. While you can fully protect Zebak’s attacks, Akkha’s attacks will still hit through prayer, so this might be a significant consideration when choosing which warden to face in phase 3.
When you finally manage to bring the warden’s HP to 5 percent, he will heal back to 20 percent and send bolts all over the place. You will need to dodge them and kill him as soon as possible. Many players find using melee for this the easiest.
Get Your OSRS Spoils
And this is it! Now that you’ve defeated the wardens, nothing stands between you and the reward chest that can potentially contain millions of OSRS GP. If it glows purple, it means it contains a unique, so your chance to get a load of OSRS gold is there. Good luck with the fights!


